Setup Gameplay
We'll create a new map and set everything up, so we can play in our dungeon
Setup Game Map
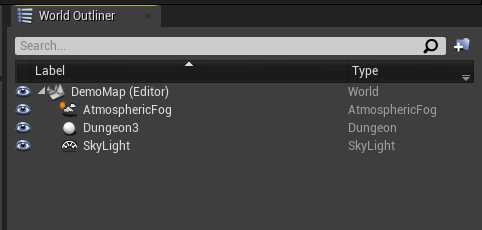
Open the map where we set up our dungeon in the previous section.
Enable Level Streaming
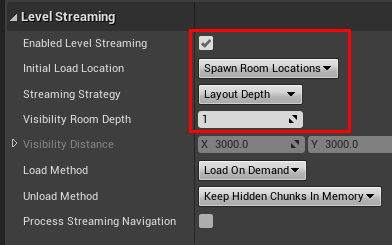
Select the Dungeon actor and set Enable Level Streaming to true. Update the following parameters:
- Set the Initial Load Location to
Spawn Room Location. This will make the spawn room be streamed in first. - Set the Streaming Strategy to "Layout Depth". After the initial modules are loaded in, this parameter determines
how the nearby modules will be loaded. With the
Layout Depthparameter, it determines the room the player is in and streams in all the nearby connected rooms - Set the Visibility Room Depth to
1or2. This specifies how many connected rooms do you want to stream in. A value of1would stream in all the connected rooms the player is in. A value of2and go another step further and stream in all the rooms connected to these rooms, and so on
For side scrollers, set the streaming strategy to Distance, this will stream in all the rooms visible on the camera,
regardless of their connection depth to the room the player is in. Update the distance value depending on how far away
your camera is
GameMode Blueprint
We'll add the game logic in a GameMode blueprint where we build a random dungeon, wait for the dungeon to stream in the spawn room, place the player in the spawn room and start the game
Create Blueprint
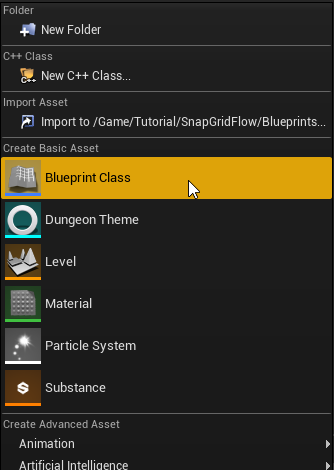
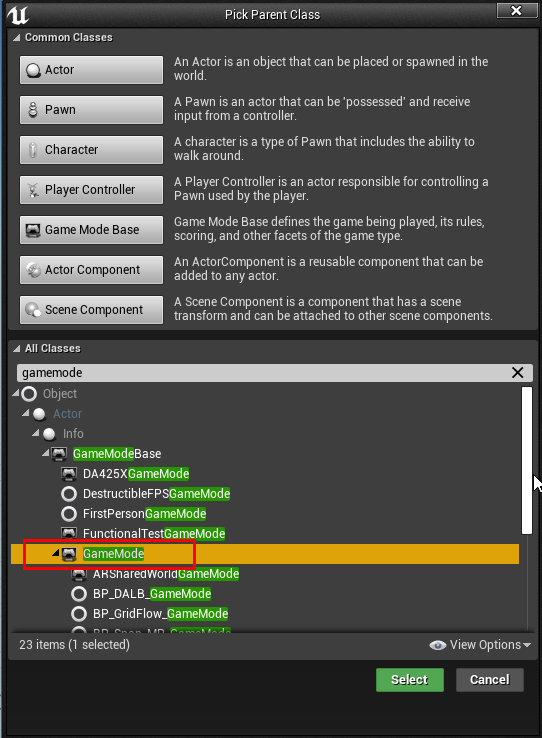
Choose GameMode and not GameModeBase
Open the blueprint

Setup BeginPlay
Create the following two variables:

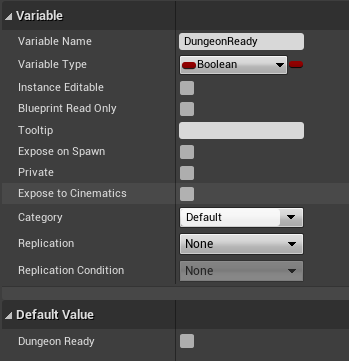
Create a boolean variable named DungeonReady as follows:
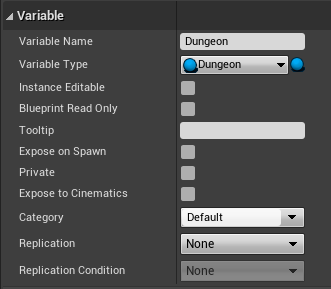
Create a Dungeon Actor variable named Dungeon as follows:
Add this to the BeginPlay (right click the below image and click Open Image in New Tab for larger view)
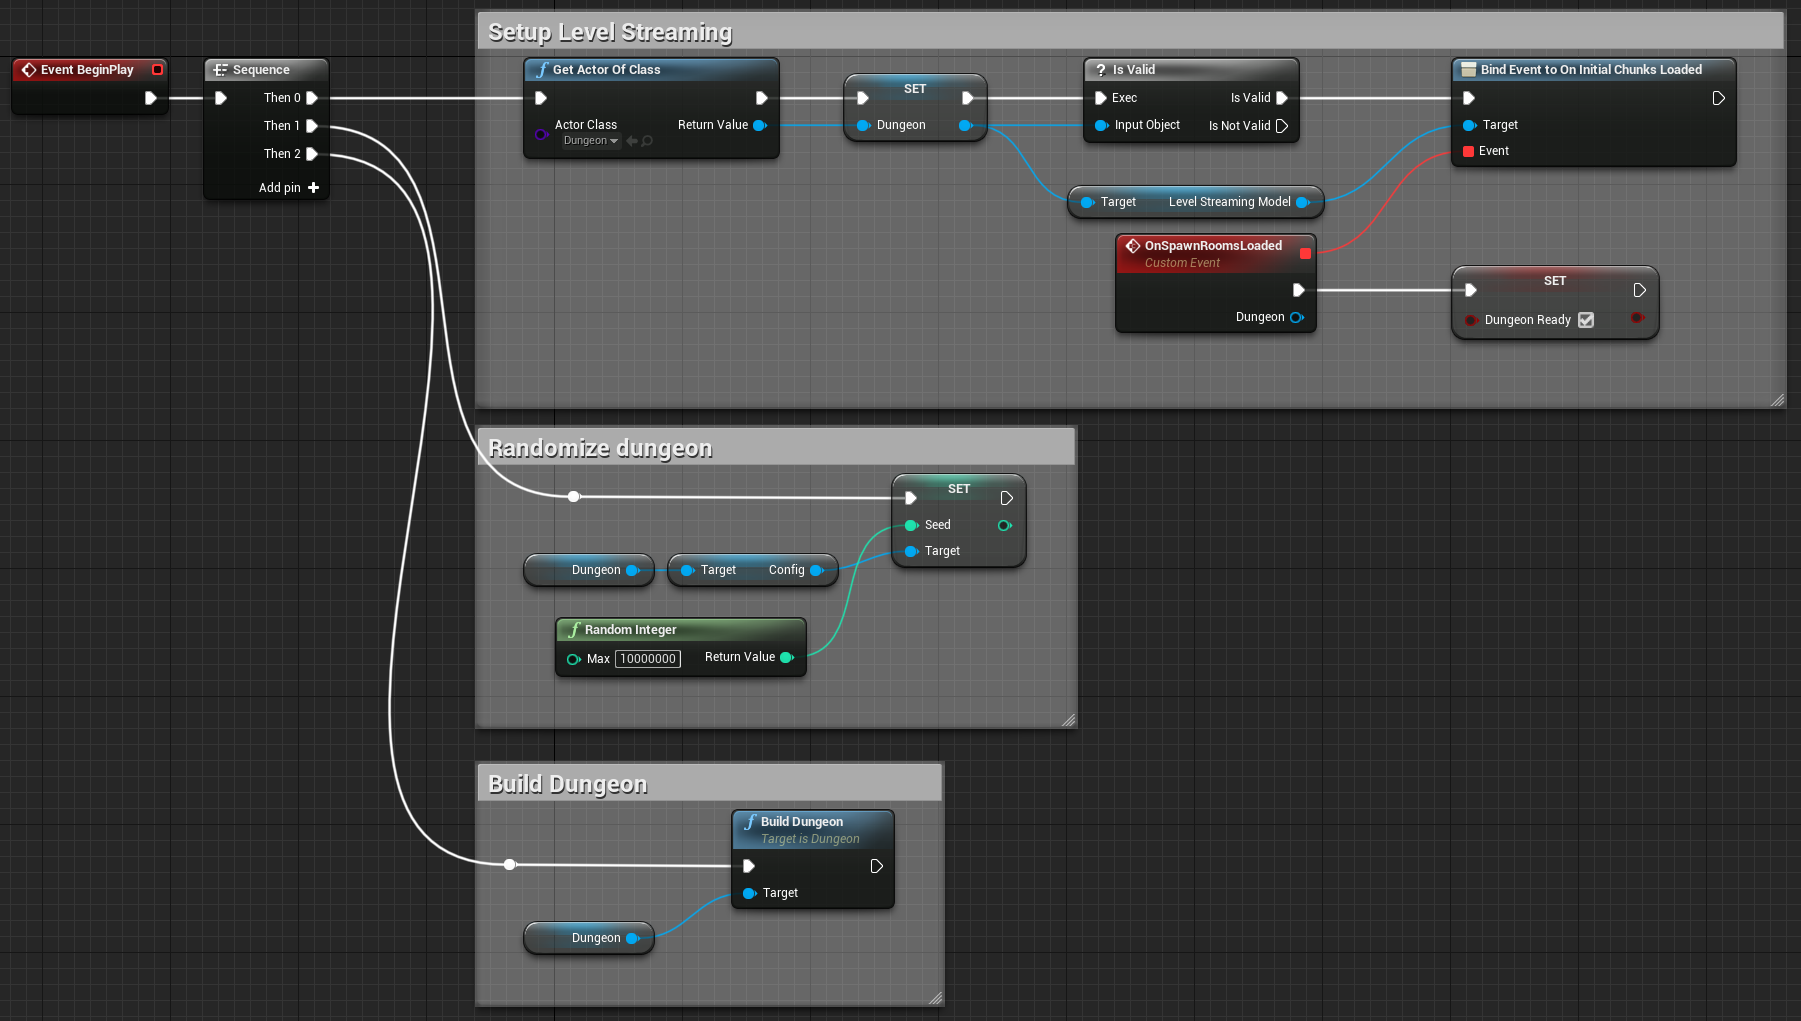
This blueprint does a few things:
-
Find a reference to an existing dungeon actor in the scene and save it in the
Dungeonvariable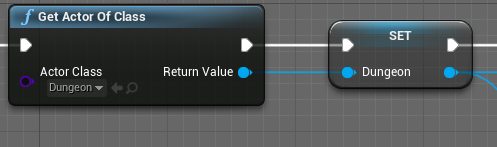
-
Hook to an event that fires when the initial chunks are fully streamed in
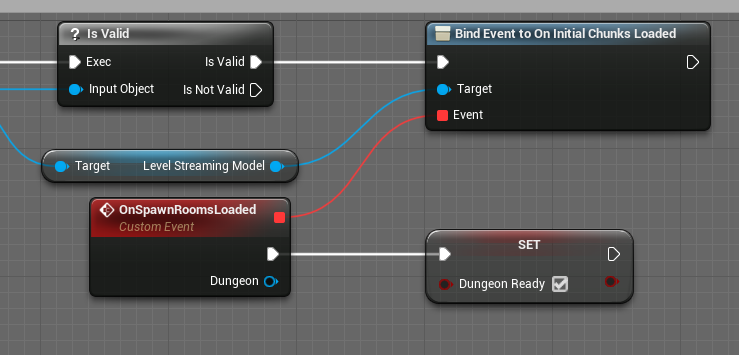
We've previously configured the dungeon actor to load the spawn room as an initial chunk. So this will fire after the spawn room is fully loaded in and visible.
A good side effect of this is, the
PlayerStartactor that was in the spawn room is also streamed in, and now we know where to spawn the player.After the spawn room is fully loaded, we set the flag
DungeonReadyto true to start the game (more on the shortly) -
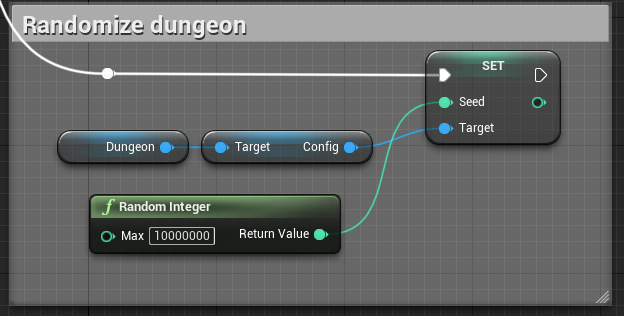
Randomize the dungeon before building it. This gives us a different dungeon every time we play
-
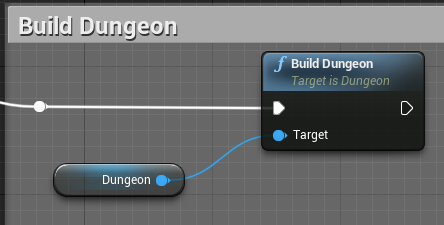
Finally, build the dungeon
ReadyToStartMatch
We want to wait till the dungeon is fully built, before starting the game
Unreal Engine provides a function named ReadyToStartMatch in the GameMode blueprint that lets you wait in
spectator mode, until we are ready. As long as we keep returning false in this function, it will stay in
spectator mode and start the game only when we return true
We have a variable DungeonReady that is set to false by default and is set to true only after the spawn room has
been fully streamed in. We will override this function and simply return the value of this variable
Override the ReadyToStartMatch function
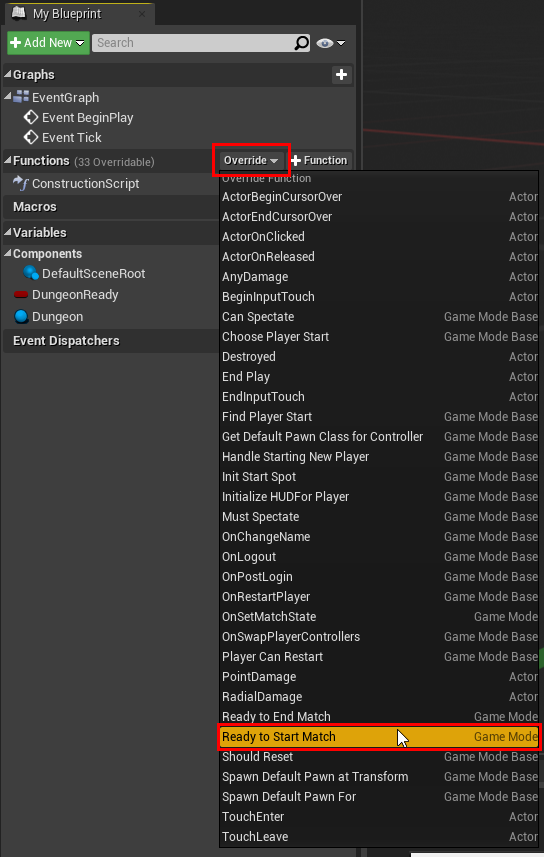
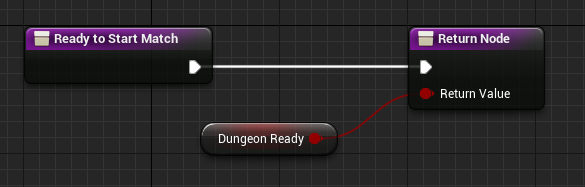
This will make the game wait in spectator mode till the dungeon is built, and the spawn room is fully streamed in
FindPlayerStart
After the game starts, the engine lets us choose a PlayerStart actor to spawn our player character at. We want
to choose the PlayerStart character that was streamed in along with the spawn room
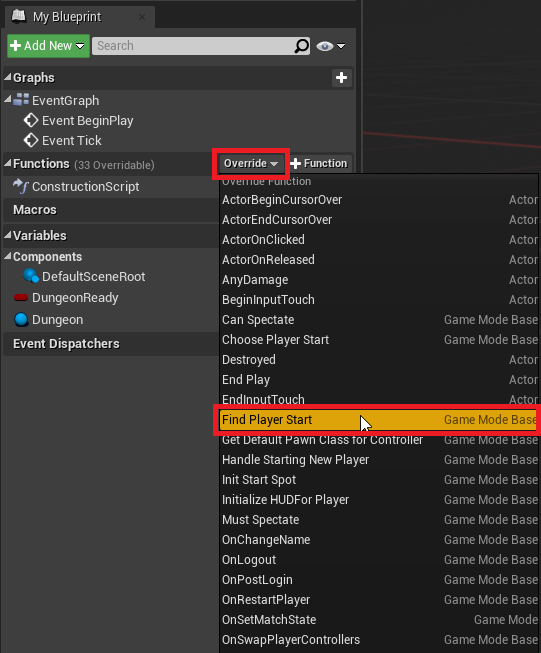
Start by overriding the FindPlayerStart function in the GameMode blueprint
Implement the function as shown below (right click the below image and click Open Image in New Tab for larger view)
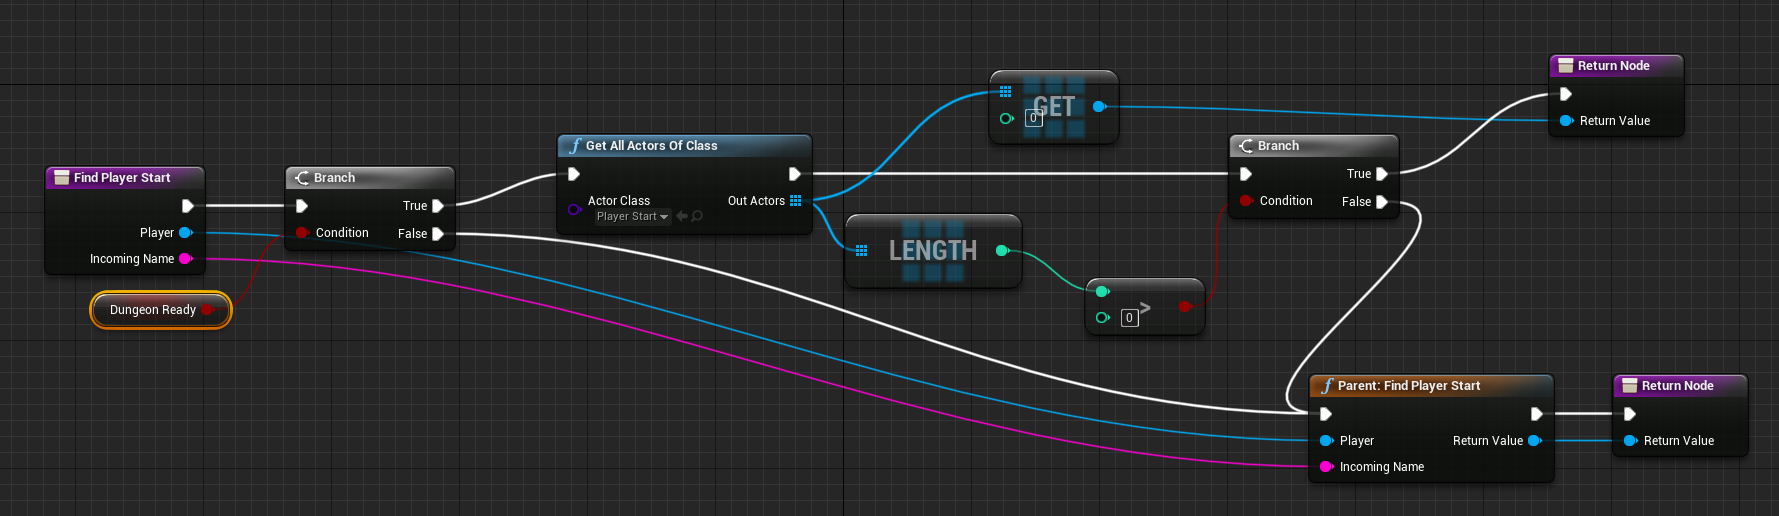
We check if the dungeon is ready (i.e. the spawn room is fully streamed in). If so, we search for a PlayerStart actor,
which we know will be there, since we've configured the spawn room to have one. Otherwise, we return the player
character that we received as input to the function (this function might be called multiple times,
even in spectator mode, so we need to do this for the engine to work correctly)
To create the "Parent FindPlayerStart" node, right click on the FindPlayerStart function and choose
Add call to Parent function
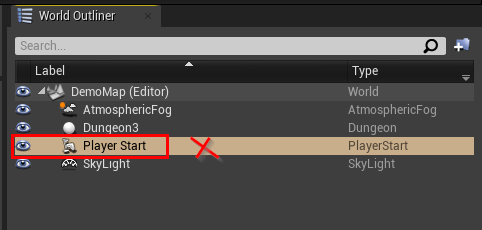
Make sure there are no other PlayerStart actors in the scene. You'll need to delete the default PlayerStart actor
in the main scene file, to make sure that doesn't get picked up
Finalize Game Map
Delete default PlayerStart
In the map where we set up our dungeon actor, make sure we don't have a PlayerStart actor. If there's one, delete it
Set Game Mode
We created a GameMode blueprint, and we'd like to use it in this map. Open up World Settings
From the Level Editor's main toolbar, choose Settings > World Settings
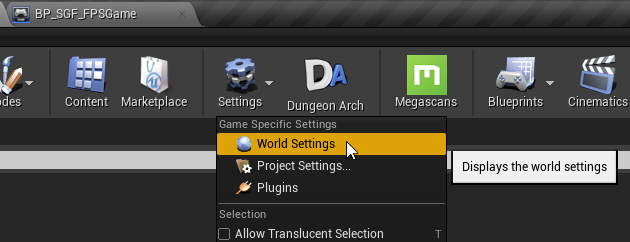
This will open up the World Settings panel. Set the Game Mode to the blueprint we just created
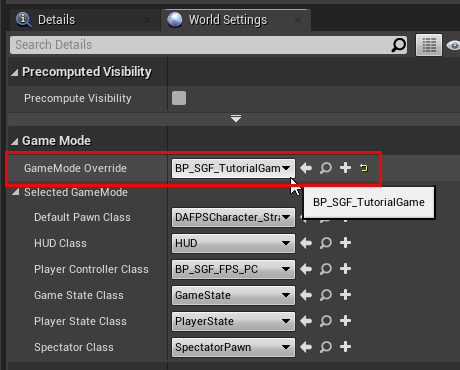
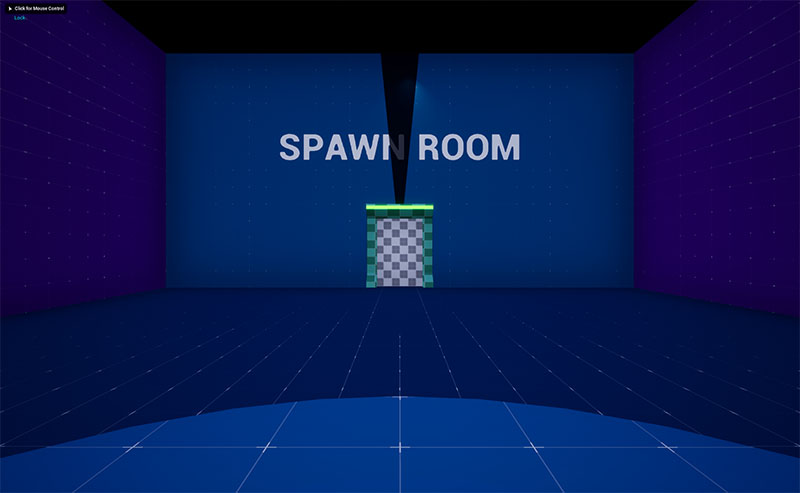
Hit Play. A random dungeon will be built, and you will be moved to the spawn room
Add Character class
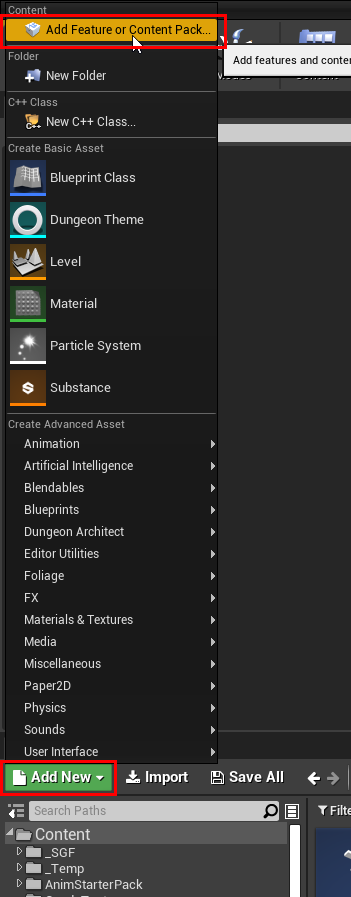
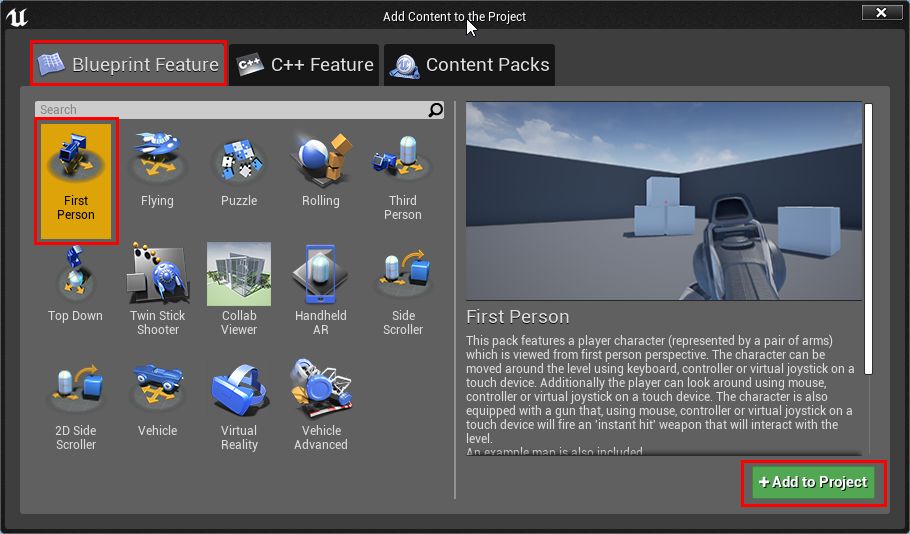
Let's add a first person character, so we can walk around and open doors. Add a First Person (or third person) content
pack from the Content Browser's Add New button
Navigate to the content folder and find the character blueprint

Open the GameMode blueprint we created earlier and assign this character blueprint to it
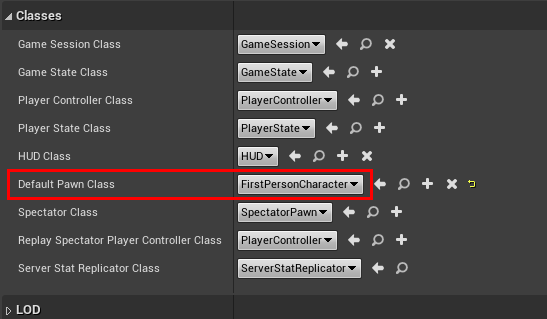
Open the game blueprint:
Click Class Defaults

Set the Default Pawn Class to the FPS character blueprint
Save and Hit Play
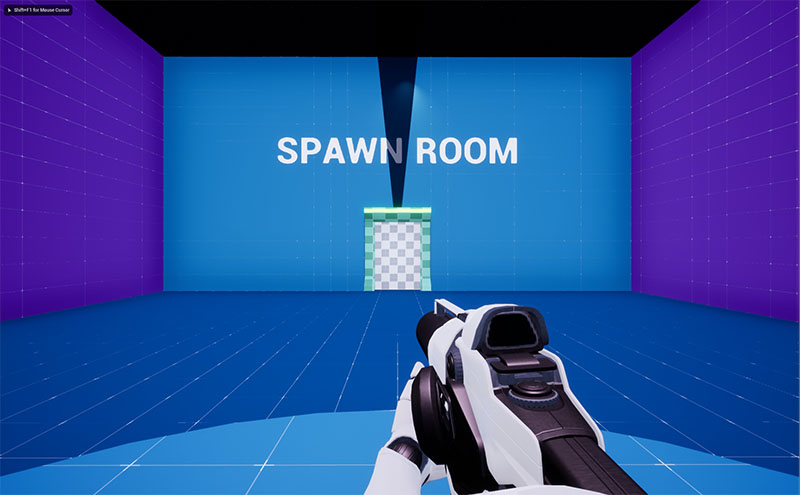
You can now move around and walk through normal doors
Support Locked Doors
We want to be able to open locked doors after we've picked up the keys. For this to happen, we need to implement a few things:
- Pickup the keys when we touch them and place it in our inventory
- When we get close to a locked door blueprint, check the keys in our inventory and find out if any one of them can open it
- A UI to show the keys in our inventory
Dungeon Architect provides a few helper components to make this easy
Player Inventory
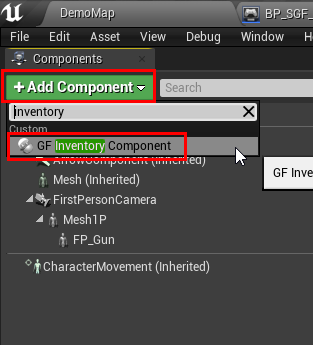
Open the character blueprint (FirstPersonCharacter or ThirdPersonCharacter)

Add the simple inventory component that comes along with the samples
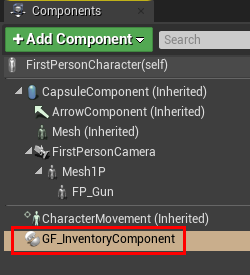
You should now be able to walk around the dungeon, pick up keys and open locked doors
Player Controller
Add a UI to show the keys in the inventory. We do this with a player controller
Create a new Player Controller and add this to the Begin Play
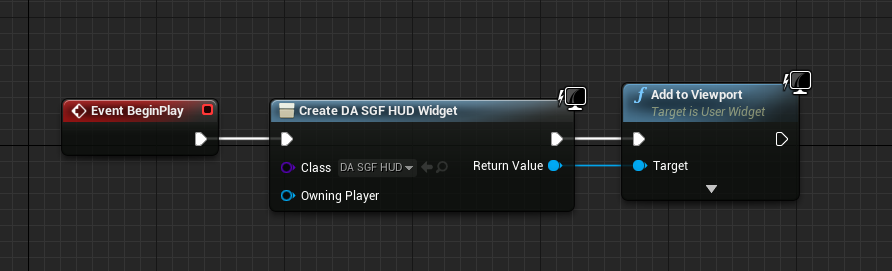
Set the UI reference to DungeonArchitect Content > Showcase > Legacy > Samples > DA_SnapGridFlow_FPS > Blueprints > UI > DA_SGF_HUD.DA_SGF_HUD
Hit play and when you pick up keys, they will be added to the inventory and UI shows them on the screen
Key-Locks Blueprints
When you spawn a Key or a Lock blueprint from the theme engine, Dungeon Architect will check if the blueprint has
the Dungeon Flow Item Metadata component attached to it. If it has one, it will set a Flow Item object to it.
You can use this object to find the other referenced Flow Item objects. The key flow item will reference all the valid lock flow items, and you can use this to check if the keys can open up a lock
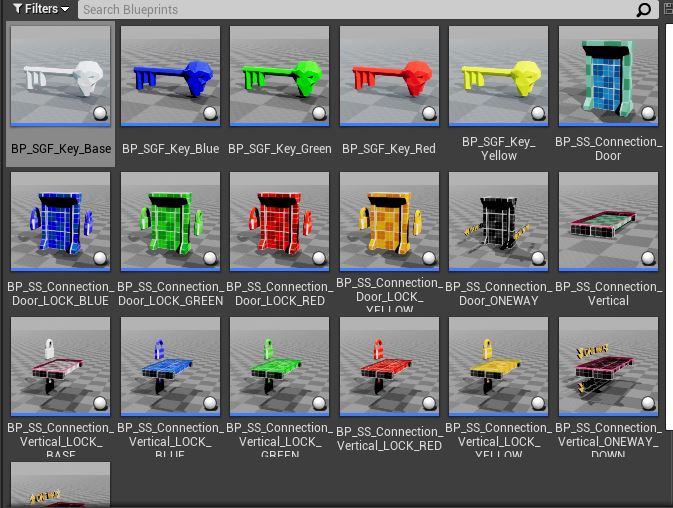
Navigate to the following folder and check how the sample keys and locks are implemented:
DungeonArchitect Content > Showcase > Legacy > Samples > DA_SnapGridFlow_SideScroller > Snap > Connection > Blueprints > BP_SGF_Key_Base