Create Spawn Room
We're going to create a spawn room and place a marker there to spawn our player prefab
Spawn Room
Create a spawn room module like before and leave a few connection points open

In this example, we've created a 1x1x1 spawn room with a single connection point
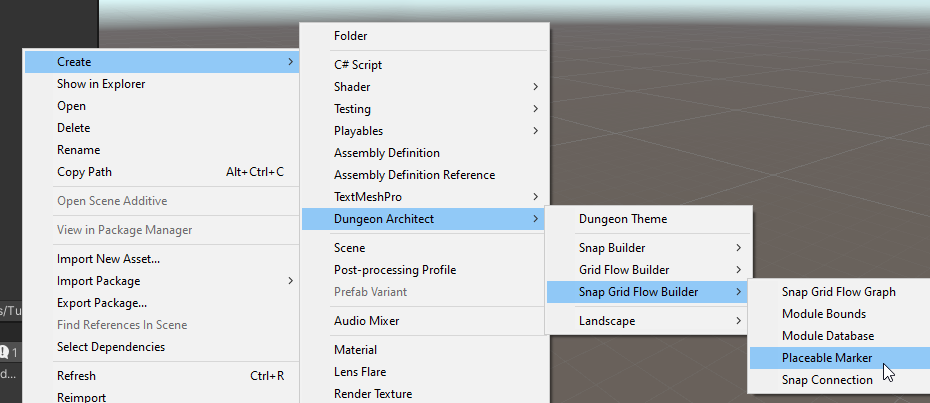
Create SpawnPoint Marker
We want the theme engine to spawn our player prefab in the spawn room. Create a placeable actor asset named
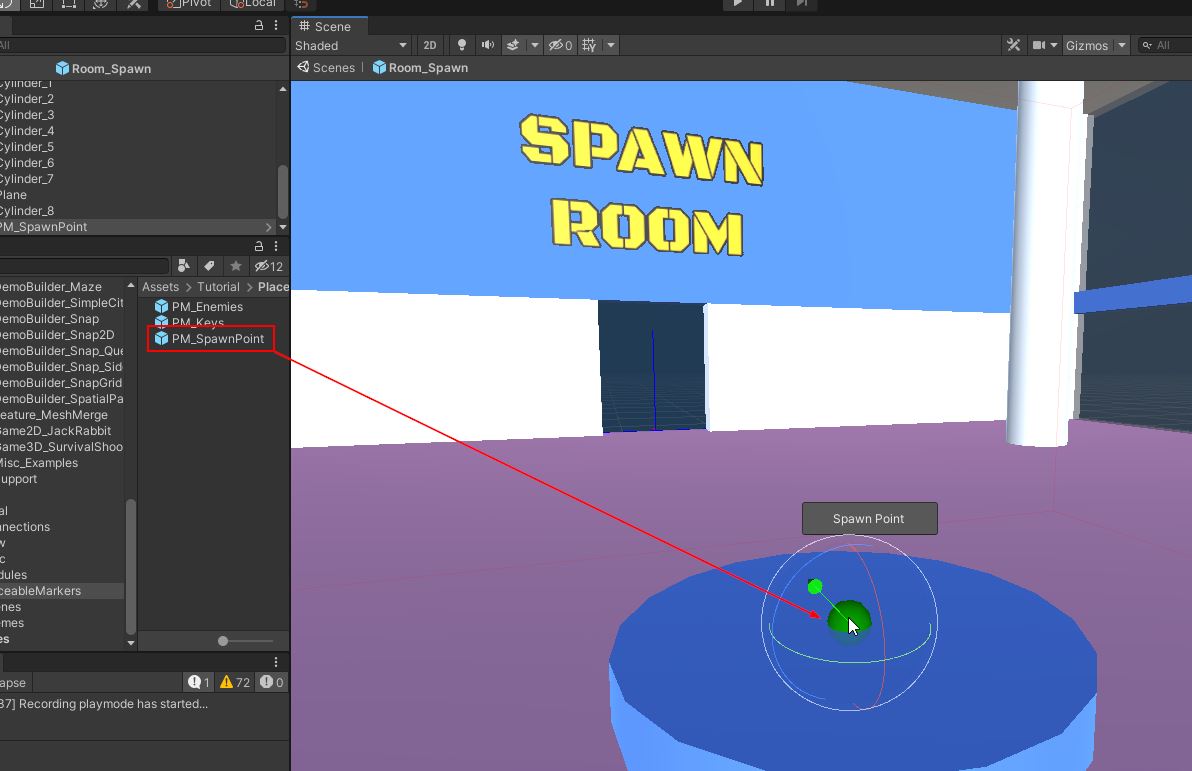
PM_SpawnPoint

Select the PM_SpawnPoint asset and inspect the properties.
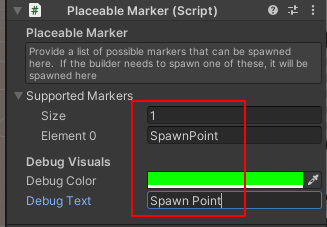
- Add a marker named
SpawnPointin the Supported Markers array - Change the debug color to green
- Set the debug text to something descriptive, like
Spawn Point
We set the marker name to
SpawnPointbecause this is what was specified in the flow graph'sCreate Main Pathnode
Save and placeable marker prefab
Add SpawnPoint Marker
Open the Spawn Room module prefab and drop this placeable marker asset somewhere appropriate
Close the prefab and return to the scene
Add Player prefab
Open the theme file we created previously.

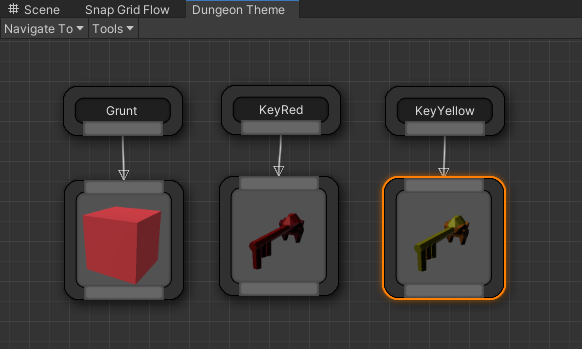
Create a new Marker node and rename it to SpawnPoint


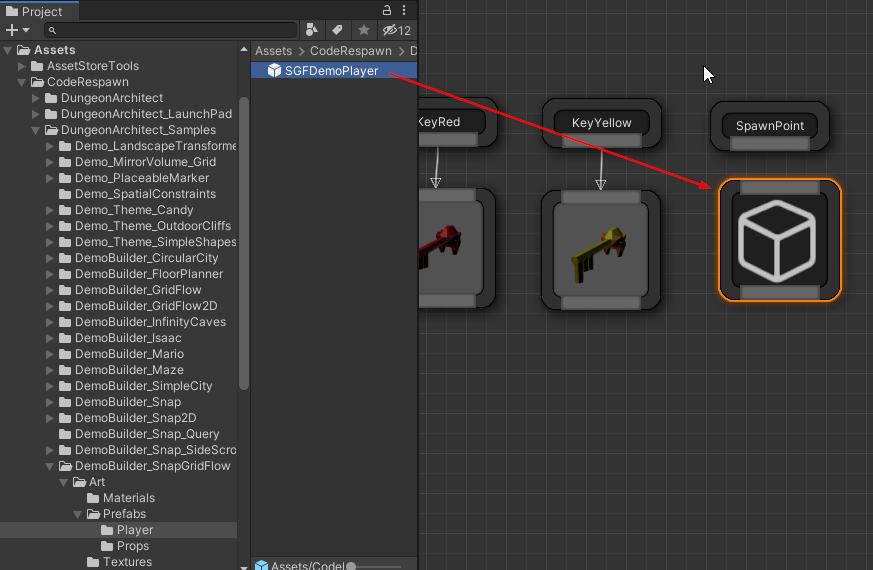
Add a player prefab. We already have a player prefab setup with some fps controls. Drop it from the samples folder
Navigate to Assets > CodeRespawn > DungeonArchitect_Samples > DemoBuilder_SnapGridFlow > Art > Prefabs > Player and drag-drop SGFDemoPlayer on to the theme editor
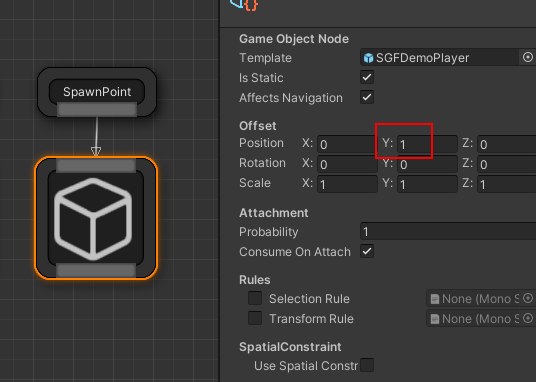
We want the player prefab to spawn 1 unit high (since the placeable markers was placed on the ground)
Save and close the theme editor
Register Spawn Module
Open up the module database and register this spawn room module
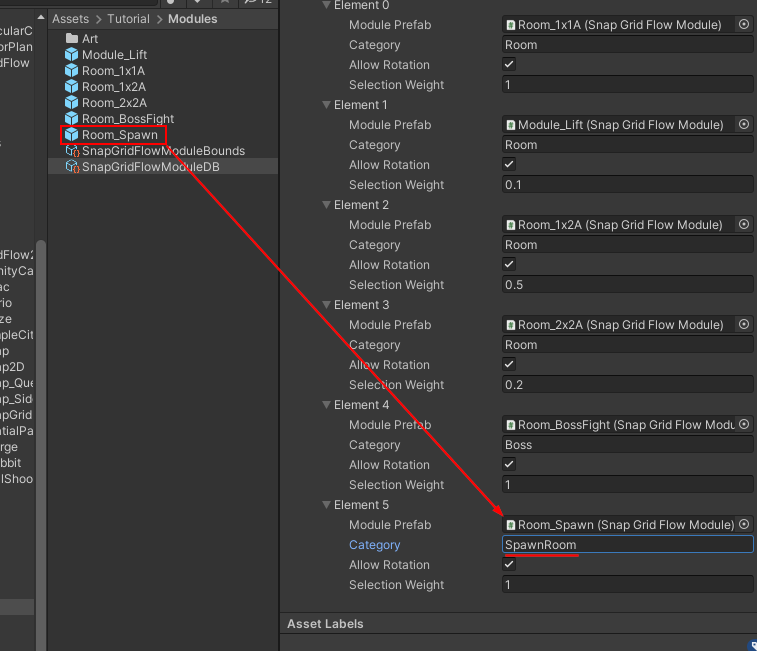
Set the category name to SpawnRoom. We'll use this category name in the flow graph shortly, to force it to
use our spawn room while building the main path
Recompile the module database cache
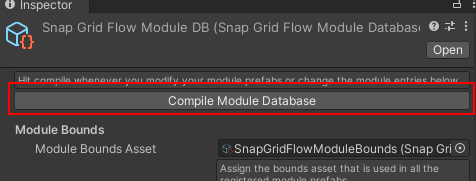
Save the module database
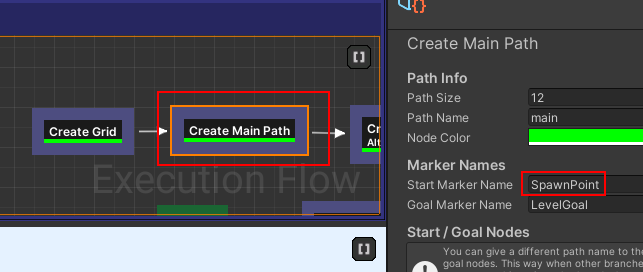
Update Flow Graph
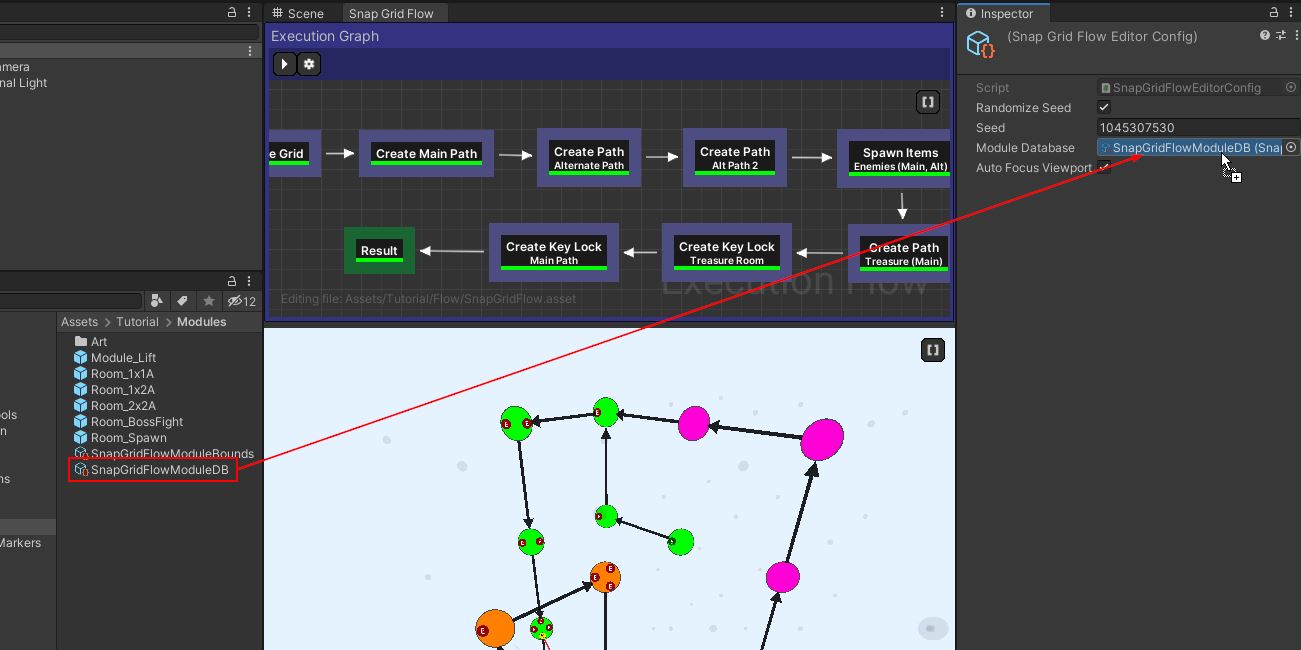
Open up our flow graph editor and reassign the Module database in the Editor Settings as before
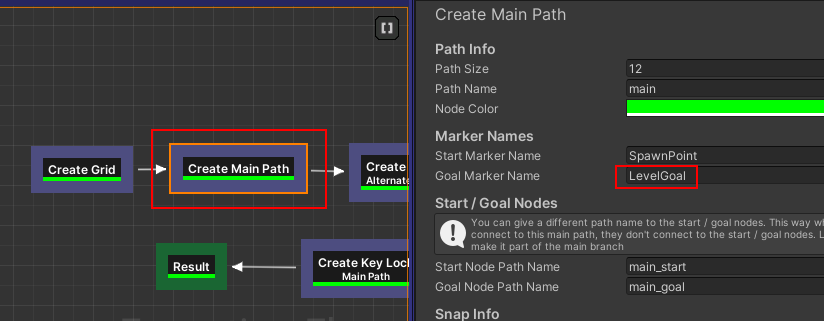
Select the Create Main Path node and inspect the properties

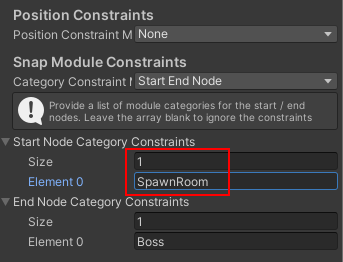
Add an entry to Start Node Category Constraints and set it to SpawnRoom.
This will make the flow editor choose the start room registered in the module database with the specified category. As of now, we have only one spawn room, feel free to register more modules with the same name to have it randomly pick one spawn room
Hit build in the flow editor and make sure it generates a flow graph correctly
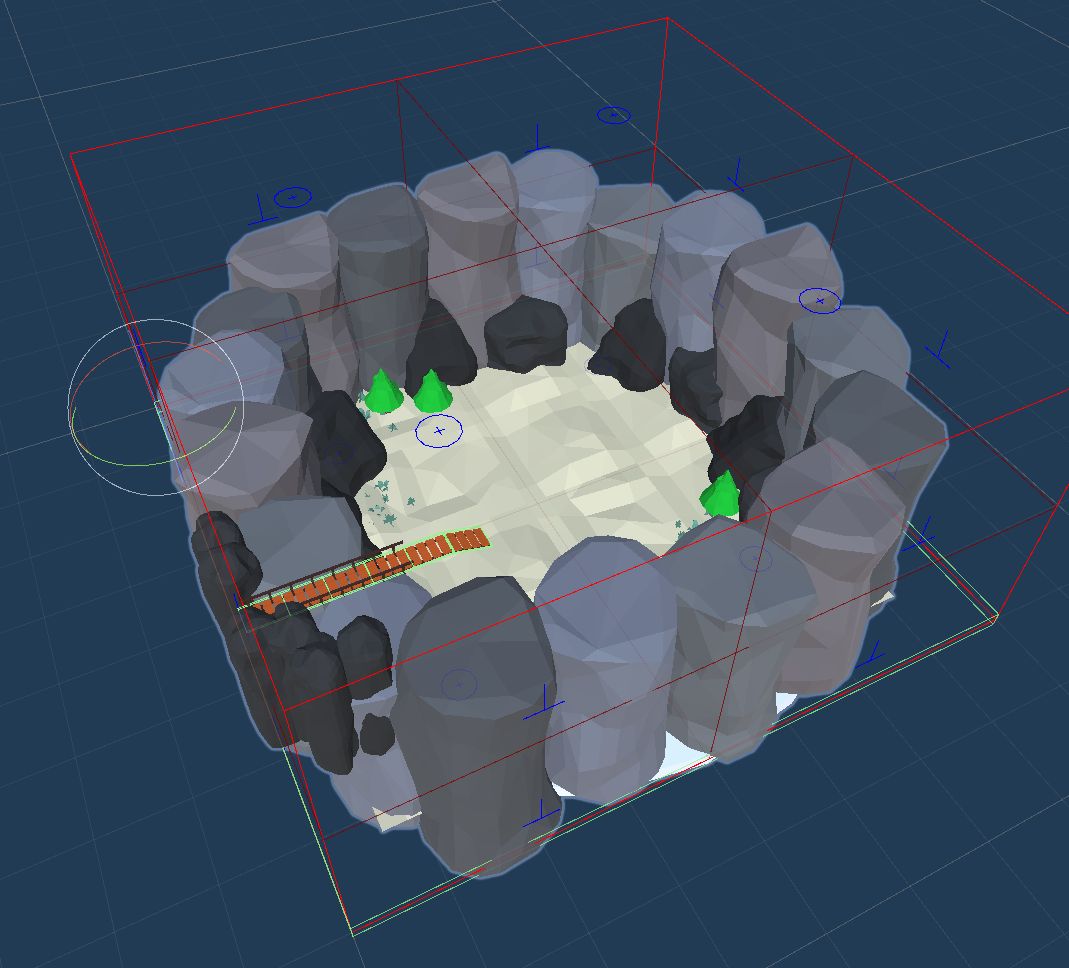
Goal Room
Open up the Goal room prefab we created earlier

We'll create a placeable marker prefab that supports the marker name LevelGoal. We'll then use the theme engine to spawn our level goal prefab (e.g. it could be an artifact that takes you to another dungeon)
This step is optional and you can skip this section if you don't want to spawn the Level Goal prefab from the theme engine. You may directly place the level goal object inside the goal room module
Create LevelGoal Marker
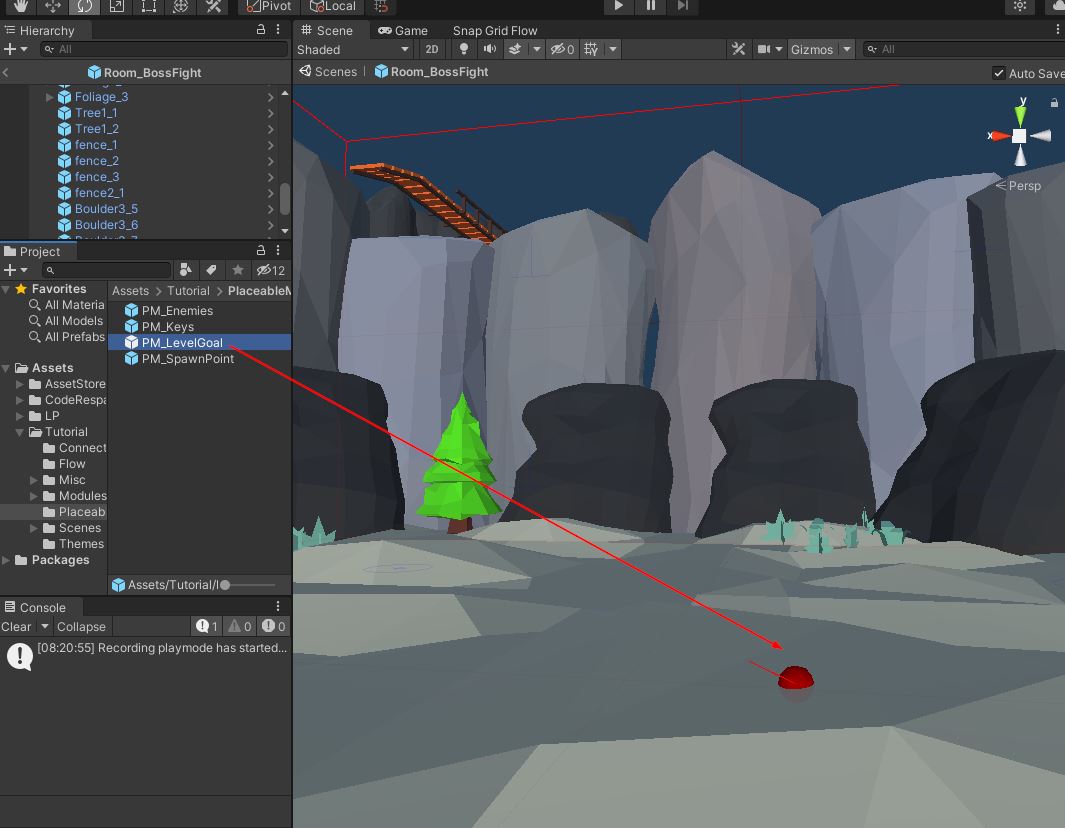
Create a Placeable Marker asset and name it PM_LevelGoal

Inspect the properties. Add LevelGoal as a Supported Marker
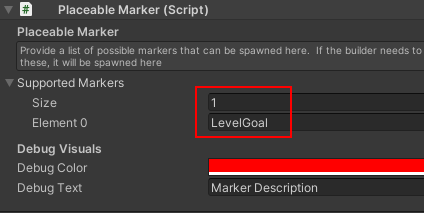
Change the Debug Text to something descriptive
We created a marker with the name
LevelGoalsince this is what we specifed in the flow graph's Create Main Path node
Add LevelGoal Marker
Add the PM_LevelGoal marker to the goal module. Drag and drop it somwhere appropriate in your goal module
Close the goal room prefab and return back to the scene

Since we've modified the markers in the module prefab, we'll need to recompile the module database cache
Open the module database and click Compile Module Database button
Add LevelGoal Prefab
Open the theme file we created previously.
Create a new Marker node and rename it to LevelGoal
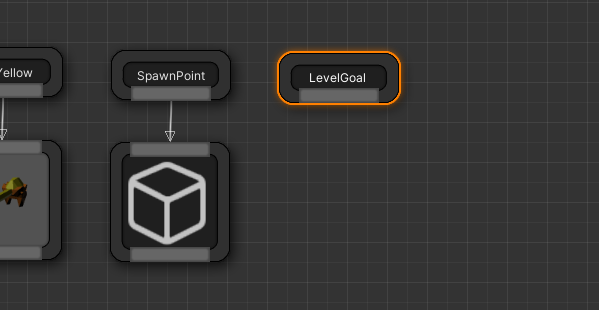
Add your level goal prefab here. We'll use a simple cube for this example that will represent the final boss

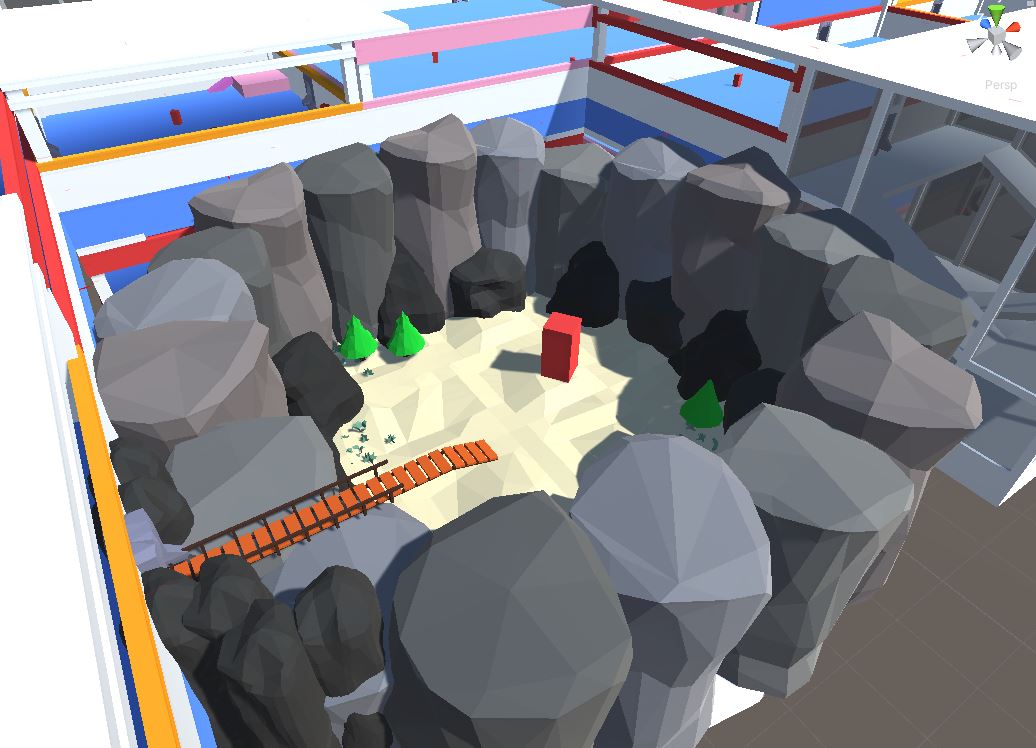
Build dungeon
Open the scene where we previously set up our dungeon. Rebuild the dungeon
You should see the spawn room, and a PlayerStart actor spawned at the correct place
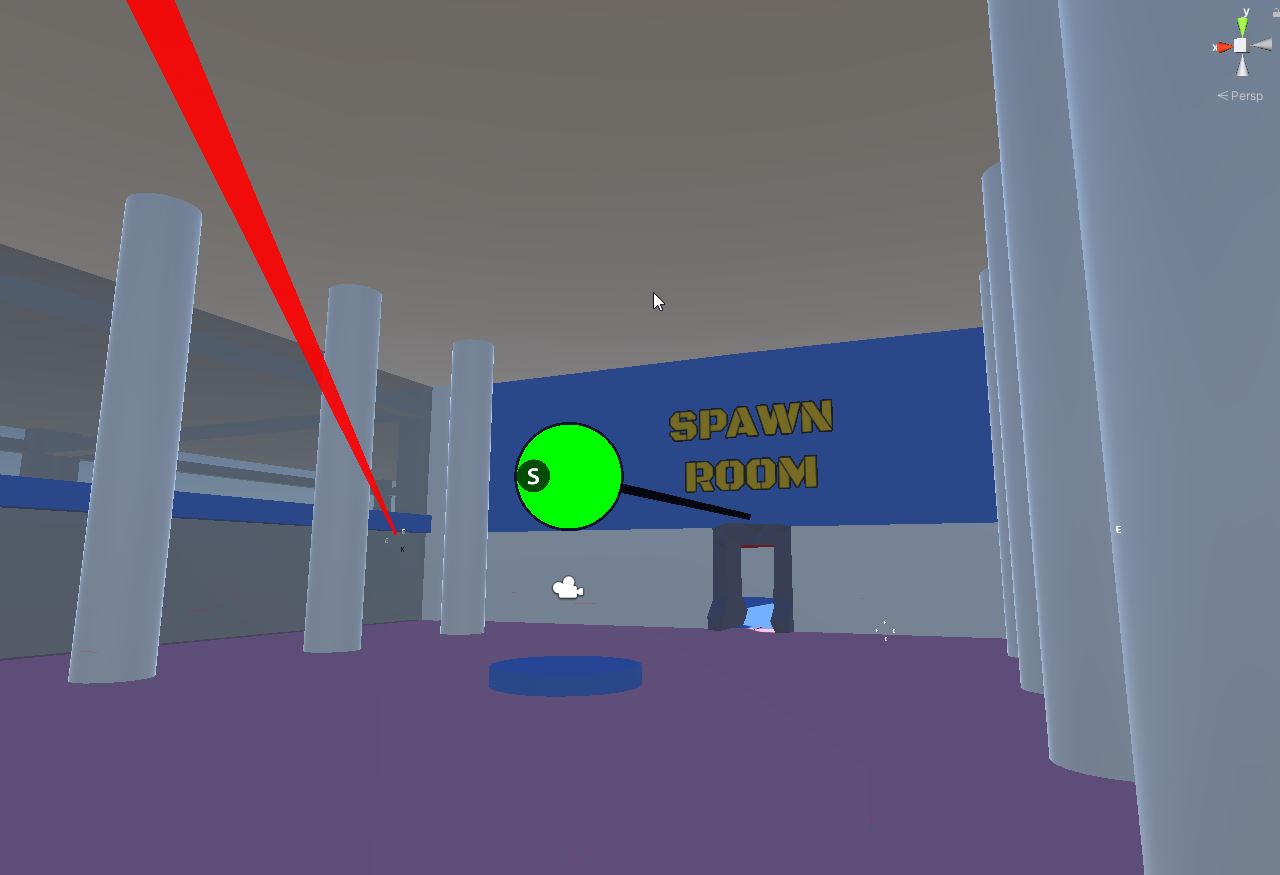
You should be able to play your game and move around with the player prefab
Level Goal prefab: